These are the manual instructions for installing and configuring OpenVPN client.
After having many problems over the years with openvpn gui breaking, I have devised a reliable work around. Create the following batch script, name it something like ovpnConnect.bat, and right click to “Run as Administrator”. This does require the openvpn gui from openvpn.net to be installed. It calls the openvpn.exe. You can also add multiple vpn client connections!
@echo off

net session >nul 2>&1
if %errorLevel% == 0 (
    echo Success: Administrative permissions confirmed.
) else (
    echo Failure: Please right click and "Run as administrator"
pause
exit 0
 )

cd "c:\Program Files\OpenVPN\config\" && "c:\Program Files\OpenVPN\bin\openvpn.exe" [userconfig].ovpn
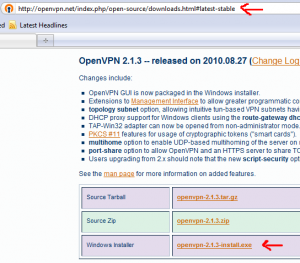
Download openvpn gui at http://openvpn.net/index.php/open-source/downloads.html#latest-stable
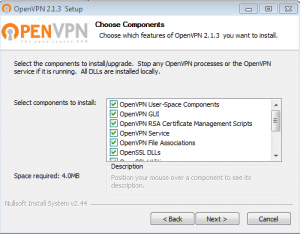
Run installer
Leave the components section as default.
Accept the TAP driver install
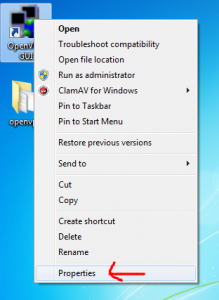
Right click on OpenVPN GUI and select properties
Go to Compatibility tab and select “run this program as administrator”
(It requires admin priviledges because it needs to write routes for the new VPN tunnel. Without, it will connect but won’t know how to reach the other network.)
Get your OpenVPN configuration files from the system administrator. Copy and paste them into C:\Program Files\OpenVPN\config

ca.crt (certificate authority)
jason.crt (client certificate)
jason.key (client secret key)
jason.ovpn (client configuration). Here are the contents of jason.ovpn:
client
dev tun0
cert jason.crt
key jason.key
ca ca.crt
remote vpn.server 1194
Now you can launch OpenVPN GUI by double clicking the icon on the desktop (the one we just set to run as admin). This will launch the OpenVPN GUI into the system tray.
Click on system tray, right click on OpenVPN GUI, left click “Connect”.
If all goes well, you will successfully connect. The OpenVPN GUI systray icon turns green. Now you are on the Virtual Private Network!


