** this post is under construction **
== Repeater setup ==
Requisites:
– solar charged
– battery powered
– low temp Li-ion charge cutoff
– low power
– no gps module due to fixed location
– advantageous location
– reliable/durable
– medium gain antenna
Materials:
Soldering iron. Whatever you have should work, no fancy soldering required
Heatshrink tubing https://www.amazon.com/Wirefy-180-Heat-Shrink-Tubing/dp/B084GDLSCK/
RAKwireless WisBlock Meshtastic Starter Kit US915 https://store.rokland.com/products/rak-wireless-wisblock-meshtastic-starter-kit
Optional GPS module https://store.rokland.com/products/rak-wireless-rak12500-gnss-gps-location-module-u-blox-zoe-m8q
Outdoor, 915mhz, dipole antenna https://www.mouser.com/ProductDetail/712-ANT-8-9-IPW1SMA
18650 Battery holder https://www.amazon.com/dp/B098SS1XYG
Nitecore low temp battery https://www.18650batterystore.com/products/nitecore-nl1835lthp-18650-3500mah-8a-low-temperature-battery
JST 2.0 Ph 2-Pin Connector Plug Male with 150mm Cable & Female https://www.amazon.com/dp/B01DUC1O68
JST ZH1.5mm 2PIN Micro Electrical Male and Female Connector Plug with 150mm Wire Cables **this is only needed if you want to bypass the low temp charge controller and plug in direct to the onboard RAK solar plug** https://www.amazon.com/dp/B0B58M7D49
5w solar panel https://www.amazon.com/Dzees-USB-C-Solar-Panel-360%C2%B0Adjustable/dp/B0CT355XFY/
Adafruit solar charger with low temp cutoff https://www.adafruit.com/product/4755
10k thermistor https://www.adafruit.com/product/372
Male DC Power adapter – 2.1mm plug to screw terminal block https://www.adafruit.com/product/369
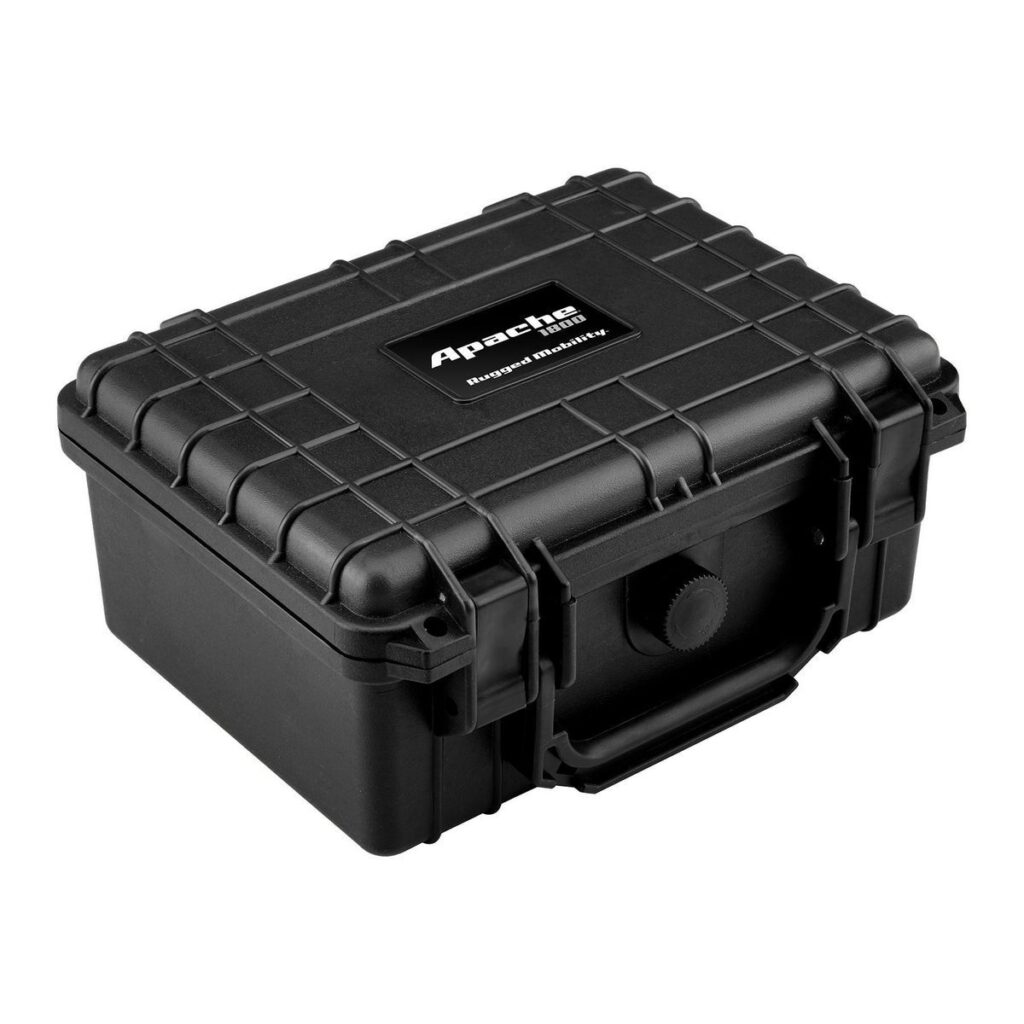
Insulated enclosure https://www.harborfreight.com/brands/apache/1800-weatherproof-protective-case-small-black-64550.html
Camo the PV and Enclosure https://www.rustoleum.com/product-catalog/consumer-brands/specialty/camouflage-spray-paint
The Rak Wisblock is the perfect choice for a repeater. Its low power, modular and extremely reliable. You can purchase the starter kit which comes with the base board (RAK19007) and the Lora + bluetooth chip (RAK4631). It comes with PCB antenna (0.8dBi) that we won’t use for this fixed repeater. Always keep the antennas connected before powering the radio! Lack of antenna load will result in damage to the radio chip.
Lets start by setting up the Rak wisblock for Meshtastic firmware
Download the version of Meshtastic that suites you. Go through the change log to help you decide https://github.com/meshtastic/firmware/releases
Here is the link to the latest stable https://github.com/meshtastic/firmware/releases/latest
The Rak4631 is a NRF52 chipset so get the firmware-nrf.. zip, make a directory and unzip into it.
unzip firmware-nrf52840-2.5.20.4c97351.ziplocate the firmware file for the wisblock 4631. Its called “firmware-rak4631-2.5.20.4c97351.uf2” (replace the 2.5.20…. with whatever fw version your using)
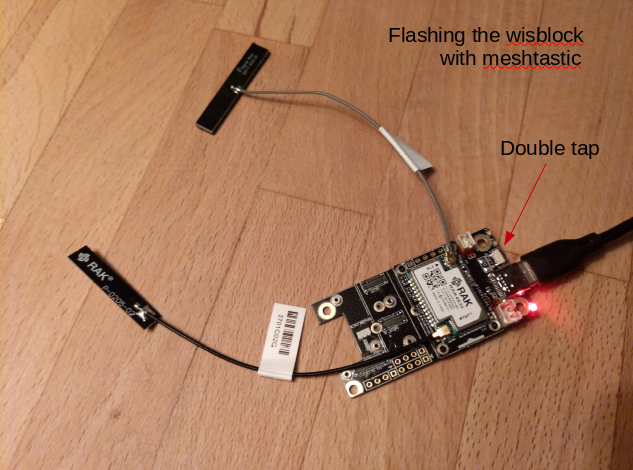
plug the wisblock into your computer and double tap the button shown below.
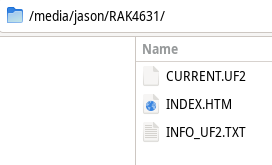
This will expose a mountable filesystem that you can copy the firmware image into.
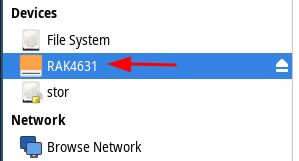
First copy the Meshtastic_nRF52_factory_erase_v3_S140_7.3.0.uf2 to the RAK4631 partition. This erases the flash storage.
Double tap the button again and copy “firmware-rak4631-2.5.20.4c97351.uf2” onto the RAK4631 mount point. It might have current.uf2, index.htm and info_uf2.txt, don’t mess with those. Just copy and paste the “firmware-rak4631-2.5.20.4c97351.uf2” file into the RAK4631 partition. The green light will flash while its transferring and it will reboot when done. The firmware is now loaded and we move onto programming the radio with meshtastic software.
We will be using the CLI (command line interface) meshtastic python script. https://meshtastic.org/docs/getting-started/initial-config/
start by creating your python environment for interfacing with the RAK firmware operating system. https://meshtastic.org/docs/getting-started/initial-config/
We will use pip to install meshtastic and create a python virtual environment to control the version of binaries and all the dependencies needed. These instructions are for Debian, of course ;-)
sudo apt-get update
sudo apt-get install python3
sudo apt-get install python3-pip
lets create a working directory for meshtastic
mkdir meshtastic

cd meshtastic
Now create the virtual environment for python
mkdir python

python3 -m venv python/
Enter the virtual environment and install meshtastic esptool and all its dependencies
source python/bin/activate

pip install --upgrade esptool meshtastic
Anytime in the future when you need to use meshtastic you will enter the python virtual environment with
source meshtastic/python/bin/activateThis way you can control the versions of meshtastic and esptool without affecting any other versions of the python scripts, binaries and dependencies on your system.
Now we can program the RAK radio
to see whats currently programmed run
meshtastic --infoIf this radio has been used before or you want to be sure of a blank slate run a factory reset
meshtastic --factory-resetNow the radio can be setup from scratch. “Region US” sets the radio up for use in the USA at 915mhz
meshtastic --set lora.region USset the name of this node
meshtastic --set-owner [name]I like to set a preset bluetooth pin so I can easily access it locally over bluetooth from android phone using the meshtastic app.
meshtastic --set bluetooth.mode FIXED_PINthe pin must be 6 characters long
meshtastic --set bluetooth.fixed_pin 123456Designate this as a router. Here is a description of what this means https://meshtastic.org/docs/configuration/radio/device/
Be very careful that you only use ROUTER if this radio has a significant advantage for your mesh. This does NOT include your roof or a hill. Router’s should be placed on the top of a large mountain, skyscraper or radio tower. Otherwise, use CLIENT as this will act like a router without degrading the mesh with a poorly placed ROUTER.
meshtastic --set device.role ROUTERSince this wisblock does not have the gps module (since its fixed location and conserves power) you will need to set its location manually. You can add a GPS module with the RAK12500 GNSS GPS Location Module.
meshtastic --set position.fixed_position true --setlat 38.88987 --setlon -77.00971meshtastic --ch-set [name] family --ch-index 0use “psk random” for high encryption aes256
meshtastic --ch-set psk random --ch-index 0Add a public key from your client radio so that you can remote administrate this router. Add base64: to the beginning of the key.
meshtastic --set security.admin_key "base64:7VRd6R0fuYGiWcqm2bFeNt8bUcUftCkiy1au6SzxFFE="run –info again to confirm changes
meshtastic --infoyou should see things like
Owner: raktest (49aa)
....
  "device": {
    "role": "ROUTER",
....
    "position": {
      "latitudeI": 388898700,
      "longitudeI": -770097100,
      "latitude": 38.88987,
      "longitude": -77.00971

....
  "bluetooth": {
    "enabled": true,
    "mode": "FIXED_PIN",
    "fixedPin": 123456
....
Channels:
  Index 0: PRIMARY psk=secret { "psk": "McyfwZfTvif/Ig6KTf5zWX0JxzFdYLPJeKYi91lhxpA=", "name": "family",
....
Index 1: SECONDARY psk=secret { "psk": "w5idYjeyhw1e5jHL5EjjQuDwEH6iqZckSbzXgZNSfGA=", "name": "admin",
To monitor the serial output of the device use noproto. This is helpful to figure out whats actually happening with your radio.
meshtastic --noprotoCHANNEL GROUPS
And finally the channels URL. These URL’s hold the encryption key and name of the channel. Use these to add future devices to the mesh. The last “Complete URL” additionally contains the admin channel so only use that for nodes that you want to use for remote administration and devices that you want to be able to remotely administer. I will go over client configs later in this post using a tbeam.
Primary channel URL: https://meshtastic.org/e/#Ci4SIDHMn8GX074n_yIOik3-c1l9CccxXWCzyXimIvdZYcaQGgZmYW1pbHk6AgggEgoIAUADSAFQHmgB

Complete URL (includes all channels): https://meshtastic.org/e/#Ci4SIDHMn8GX074n_yIOik3-c1l9CccxXWCzyXimIvdZYcaQGgZmYW1pbHk6AgggCikSIMOYnWI3socNXuYxy-RI40Lg8BB-oqmXJEm814GTUnxgGgVhZG1pbhIKCAFAA0gBUB5oAQ
copy and paste the channel URL’s into your notes, for later.
Now we move on to the hardware needed to turn this into a robust, long term outdoor repeater
The RAK repeater is very tolerant to extreme temperatures but the li-ion battery is not so forgiving. It is sensitive to very hot and cold conditions. The most limiting factor is charging li-ion in freezing conditions. This will quickly destroy a battery. To help minimize temperature swings I opted for a larger container with some insulation to smooth out the hot and cold transitions. This case was cheap, insulated and decent quality. So far its survived a few years in the harshest of conditions. https://www.harborfreight.com/brands/apache/1800-weatherproof-protective-case-small-black-64550.html
This case is not enough to keep the battery above freezing. Winter months are long and very cold and my batteries would get trashed within a few months of use in winter conditions. To solve this problem I used a low temp-cutoff charge controller from adafruit. https://www.adafruit.com/product/4755 in conjunction with a 10k thermistor https://www.adafruit.com/product/372
This charge controller is far superior to the internal charge controller of the RAK and with the added low temp cutoff I haven’t had to replace a battery since.
== Roaming mobile nodes ==
Requisites:
– Small/portable
– low power
– battery powered
– GPS
– waterproof
– low gain antenna
– easily re-charged (usb)
Materials:
cable gland pg9 https://www.amazon.com/dp/B07VT317NT
39/64″ drill bit https://www.amazon.com/Drill-America-High-Speed-Reduced-Shank-64/dp/B01BKTNHPY/
Pelican 1010 micro enclosure https://www.pelican.com/us/en/product/cases/micro/1010
TO BE CONTINUED…