Feb 052014
 
 February 5, 2014  Posted by at 2:20 pm documentation, networking, security, vpn Tagged with: , , ,  21 Responses »

OpenVPN Client/Server Implemenation

==== key signing ====
You can host the certificate authority on the vyos device itself. This is obviously not as secure as hosting it on a separate system. If someone was to get into the vyos they would have access to all your keys and would be able to sign new keys against the CA. Nonetheless, it is convenient and secure-enough for many sites. This is how it can be done.
From the VyOS, copy the easy-rsa directory into /config, where it won’t get lost on an upgrade.

cp -rv /usr/share/doc/openvpn/examples/easy-rsa/2.0/ /config/easy-rsa2
vi /config/easy-rsa2/vars

edit the options at the bottom of /config/easy-rsa2/vars to personalize them. Increasing KEY_SIZE to 2048 is recommended. Also, you can increase the certificate authority and key expiration. These are the defaults:

 ...
# Increase this to 2048 if you
# are paranoid.  This will slow
# down TLS negotiation performance
# as well as the one-time DH parms
# generation process.
export KEY_SIZE=1024

# In how many days should the root CA key expire?
export CA_EXPIRE=3650

# In how many days should certificates expire?
export KEY_EXPIRE=3650

export KEY_COUNTRY="US"
export KEY_PROVINCE="CA"
export KEY_CITY="SanFrancisco"
export KEY_ORG="Fort-Funston"
export KEY_EMAIL="me@myhost.mydomain"

now load the variables

$ cd /config/easy-rsa2/
$ source ./vars

start fresh in case there is something old lingering around in there. This will delete all keys, etc.

$ ./clean-all

Build the certificate authority files

$ ./build-ca

Build the diffie-hellman key exchange

$ ./build-dh

Build the key for the server

$ ./build-key-server js-server

Copy the certs and keys into /config/auth

sudo cp /config/easy-rsa2/keys/ca.crt /config/auth/
sudo cp /config/easy-rsa2/keys/dh1024.pem /config/auth/
sudo cp /config/easy-rsa2/keys/js-server.key /config/auth/
sudo cp /config/easy-rsa2/keys/js-server.crt /config/auth/

Now you can build the key for the client and distribute to them
use ./build-key to generate a certificate that will connect to the vpn without a pass-phrase and ./build-key-pass if you want the user to enter a pass-phrase before connecting. ./build-key-pass is more secure in case someone steals your certificate and key they will still need to enter a password to connect.

$ ./build-key jimmy

answer all questions accordingly and be sure to answer yes to “Sign the certificate?” the “1 out of 1 certificate requests certified, commit?”
Now copy the keys and certs and create a config for Jimmy to remote in with. This is how I do it.
first make a directory for the client in /config/easy-rsa2/keys

cd /config/easy-rsa2/keys
mkdir jimmy
cp jimmy* jimmy/
cp ca.crt jimmy/

create a client config with your favorite text editor,

vi jimmy/jsvpnserver.ovpn

and add the following

client
proto udp
remote-cert-tls server
verb 2
dev tun0
cert jimmy.crt
key jimmy.key
ca ca.crt
remote [vpn-server host or ip] 1194

From your local computer download the config directory (jimmy) from the vpn server

$ scp -r vyos@10.101.101.1:/config/easy-rsa2/keys/jimmy .

this copies the jimmy directory into the current directory on your computer (the period designates current directory). If your on MS Windows you will need to use cygwin or putty-scp to do this. Also, if using MS Windows you will need to run unix2dos on those files
from your computer where you downloaded the jimmy folder to.

unix2dos jimmy/*

I wrote a script to do all this for you -> http://jasonschaefer.com/stuff/easyrsa-user-setup-vyos.sh.txt

Setting up the OpenVPN Server

The server subnet needs to be a different subnet from your LAN. Set it to something unique that will be unlikely on any remote networks your clients will be on.
The “–push route 10.101.101.0 255.255.255.0” needs to be changed to the subnet on the LAN of the router. The one you will VPN in to access.

set interfaces openvpn vtun0 mode server
set interfaces openvpn vtun0 server subnet 10.206.109.0/24
set interfaces openvpn vtun0 server name-server 10.101.101.1
set interfaces openvpn vtun0 server domain-name jasonschaefer.com
set interfaces openvpn vtun0 server push-route 10.101.101.0/24
set service dns forwarding listen-on vtun0
set interfaces openvpn vtun0 tls cert-file /config/auth/js-server.crt
set interfaces openvpn vtun0 tls key-file /config/auth/js-server.key
set interfaces openvpn vtun0 tls ca-cert-file /config/auth/ca.crt
set interfaces openvpn vtun0 tls dh-file /config/auth/dh1024.pem

#Set the firewall to allow openvpn through

set firewall name wan-local rule 40 action accept
set firewall name wan-local rule 40 destination port openvpn
set firewall name wan-local rule 40 protocol udp
commit
save

Thats it! Your done!

STATIC CLIENT ADDRESS

The static ip address for each client is done with this command:

set interfaces openvpn vtun0 server client leroy ip 10.206.109.123

The name “leroy” is the Common Name of the certificate. After this is committed leroy will receive .123 on his laptop each time he connects to the vpn.

ROUTING VARIOUS LAN’s OVER VPN

The routing between a remote LAN (iroute) is done like this:

set interfaces openvpn vtun0 server client leroyhome ip 10.206.109.0.3
set interfaces openvpn vtun0 server client leroyhome subnet 10.101.103.0/24

The “subnet” option is openvpn’s internal route (iroute) function. This tells openvpn what the remote LAN subnet is. In this example, 10.101.103.0/24 is leroys house LAN.

Now you can add a static route in order to route to this remote LAN.

set protocols static route 10.101.103.0/24 next-hop 10.206.109.1

10.206.109.1 is the openvpn routers interface vtun0 ip address.

If your designing a network with multiple remote sites its convenient to make their addresses contiguous and route to them all with a single route.

10.101.101.0/24 (my house)
10.101.102.0/24 (geoff’s house)
10.101.103.0/24 (leroy’s house)

I use subnetcalc to figure out the host ranges

$ subnetcalc 10.101.101.0/22
  Host Range    = { 10.101.100.1 - 10.101.103.254 }
  - 10.101.101.0 is a HOST address in 10.101.100.0/22

So, a slash 22 cover from .100-.103, that’s perfect for our small network.

set protocols static route 10.101.100.0/22 next-hop 10.206.109.1

and you need to push this route to all the clients

set interfaces openvpn vtun0 server push-route 10.101.100.0/22

SITE TO SITE VPN

basic instructions:

generate the passive key for head office from inside the easyrsa folder

source ./vars
./build-key-server site2site_server-passive
scp keys/site2site_server-passive.* user@vpn-server-passive-host:/config/auth/

#active key for branch office, this side initiates the vpn handshakes

./build-key site2site_active
scp keys/site2site_active.* user@vpn-server-active-host:/config/auth/

active site files in /config/auth/
ca.crt,
site2site_active.key,
site2site_active.crt

passive site files in /config/auth/
ca.crt,
site2site_server-passive.key,
site2site_server-passive.crt,
dh1024.pem

==================

#site to site openvpn

set interfaces openvpn vtun9
set interfaces openvpn vtun9 local-address 172.16.9.[1 | 2]
set interfaces openvpn vtun9 remote-address 172.16.9.[1 | 2]
set interfaces openvpn vtun9 remote-host [remote-vpn-host]

#standard openvpn port is 1194, best used for client/server mode. prevents ovpn config from needing port setting

set interfaces openvpn vtun9 local-port 1195
set interfaces openvpn vtun9 remote-port 1195
set interfaces openvpn vtun9 mode site-to-site
set interfaces openvpn vtun9 tls ca-cert-file /root/ca.crt
#the passive site cert/key needs to be signed as a server!
set interfaces openvpn vtun9 tls key-file /root/[passive.key | active.key ]
set interfaces openvpn vtun9 tls cert-file /root/[passive.crt | active.crt]
set interfaces openvpn vtun9 tls role [active | passive]
#dh1024.pem is required on passive host only!
set interfaces openvpn vtun9 tls dh-file /root/dh1024.pem
commit;save

#open firewall for openvpn

set firewall name wan-local rule 20 action accept
set firewall name wan-local rule 20 destination port 1195
set firewall name wan-local rule 20 protocol tcp_udp

#set static routes to networks on other side of vpn, if any

set protocols static route 192.168.7.0/24 next-hop 172.16.9.[1 | 2]
set protocols static route 192.168.8.0/24 next-hop 172.16.9.[1 | 2]
commit;save

DYNAMIC DNS

How to reach your vpn server and avoid using a static ip. We will be using afraid.org to automatically update a hostname’s A record with the public ip of your Vyos VPN server.

You will need to register for an account at https://freedns.afraid.org. Then create a subdomain, for this example it will be myvpnserver.mooo.com. Go to the “Dynamic DNS” section and copy the “Direct URL”.

Create a script under /config/scripts on your Vyos.
vi /config/scripts/myvpnserver.mooo.com.sh

#!/bin/bash
/usr/bin/curl -k [paste your direct url here]

Make it executable
chmod 755 /config/scripts/myvpnserver.mooo.com.sh

Now tell Vyos to run this with cron.
set system task-scheduler task dynamicDNS executable path /config/scripts/myvpnserver.mooo.com.sh
set system task-scheduler task dynamicDNS interval 15m

REVOKE KEYS ON VYOS

vyos@router:~$ cd /config/easy-rsa2/

vyos@router:/config/easy-rsa2$ ./revoke-full jimmy

Using configuration from /config/easy-rsa2/openssl.cnf
Revoking Certificate 0E.
Data Base Updated
Using configuration from /config/easy-rsa2/openssl.cnf
jimmy.crt: /C=US/ST=NM/L=SantaFe/O=Blah/CN=jimmy/emailAddress=jimmy@localhost.local
error 23 at 0 depth lookup:certificate revoked

The error 23 at 0 … is normal and expected.

Now copy the updated CRL (certificate revocation list) to /config/auth
vyos@router:/config/easy-rsa2$ cp keys/crl.pem /config/auth/

If this is the first revocation you need to add it to the config as well:

vyos@router:~$ configure
vyos@router# set interfaces openvpn vtun0 tls crl-file /config/auth/crl.pem
vyos@router# save; commit; exit
Saving configuration to ‘/config/config.boot’…
Done
No configuration changes to commit
exit

VERIFY REVOKED CERTIFICATES

You can verify the revoked keys with the openssl command
vyos@router:~$ openssl crl -in /config/auth/crl.pem -text

Revoked Certificates:
    Serial Number: 08
        Revocation Date: Jan 30 00:19:24 2016 GMT
    Serial Number: 0E
        Revocation Date: Jul 13 22:51:50 2016 GMT

In the above example keys 08 and 0E have been revoked
vyos@router:~$ cat /config/easy-rsa2/keys/index.txt

V	230804225528Z		        02	unknown	/C=US/ST=NM/L=SantaFe/O=SITC/CN=jason/emailAddress=jason@local
R	230806213443Z	160130001924Z	08	unknown	/C=US/ST=NM/L=SantaFe/O=Blah/CN=john/emailAddress=john@localhost
R	260711225142Z	160713225150Z	0E	unknown	/C=US/ST=NM/L=SantaFe/O=Blah/CN=jimmy/emailAddress=jimmy@localhost.local

From this file index.txt, you can ascertain which serial numbers belong to which users!
Oct 032013
 
 October 3, 2013  Posted by at 4:15 pm documentation, vpn Tagged with: , , ,  No Responses »

This outlines a typical VPN implementation with server, clients and routing. Using Attitude Adjustment 12.09. Although, this should work on any new version of OpenWRT. Last tested on version 17.

Start by ssh’ing into the router and installing packages.

root@myWRT:~# opkg update
root@myWRT:~# opkg install openvpn-openssl openvpn-easy-rsa

Create a “openvpnconfig” directory under config and move the easy-rsa directory into it. The nice thing about this setup is that backups will include all openvpn relevant files automatically, because they are under /etc/config/

root@myWRT:~# mkdir /etc/config/openvpnconfig
root@myWRT:~# mv /etc/easy-rsa/ /etc/config/openvpnconfig/
root@myWRT:~# cd /etc
root@myWRT:~# ln -s config/openvpnconfig/easy-rsa
(this creates a relative symlink)

== CERTIFICATE AUTHORITY FOR OPENVPN ==
edit the following or don’t if you want to enter it manually on certificate creation.
At the end of the /etc/easy-rsa/vars file:

# These are the default values for fields
# which will be placed in the certificate.
# Don't leave any of these fields blank.
export KEY_COUNTRY="US" <-*edit*
export KEY_PROVINCE="CA" <-*edit*
export KEY_CITY="SanFrancisco" <-*edit*
export KEY_ORG="Fort-Funston" <-*edit*
export KEY_EMAIL="me@myhost.mydomain"
export KEY_EMAIL=mail@host.domain
export KEY_CN=changeme <-*edit - servers hostname*
export KEY_NAME=changeme
export KEY_OU=changeme
export PKCS11_MODULE_PATH=changeme
export PKCS11_PIN=1234

root@myWRT:~# clean-all (run this to ensure your starting with a clean slate)
root@myWRT:~# build-ca
root@myWRT:~# build-dh (very slow.. this can be run elsewhere and copied over to the openwrt vpn server **)
root@myWRT:~# build-key-server server (don’t set a challenge password, Answer yes to sign the certificate and yes to commit.)

** building diffie hellman “build-dh” on a fast computer and copying to slow router/computer:
run ps while you are running build-dh to see what command is being used.
12158 root 3304 R openssl dhparam -out /etc/easy-rsa/keys/dh2048.pem 2048
don’t forget to ctrl + c your build-dh command
now go to your fast laptop:
jason@laptop:~$ openssl dhparam -out dh2048.pem 2048
jason@laptop:~$ scp dh2048.pem root@10.11.13.1:/etc/config/openvpnconfig/easy-rsa/keys

Moving on to the config files:

Instead of using UCI syntax we can break this out to be more openvpn standard and troubleshooting friendly. Also, I have added the ability to set static ip’s for the openvpn clients.

== OPENVPN SERVER CONFIG ==
Overwrite /etc/config/openvpn with the following config

##/etc/config/openvpn##
package openvpn
config openvpn openvpn_WRT
option enabled 1
option config /etc/config/openvpnconfig/openvpnWRT.conf

The following is the openvpn server config (which is called by /etc/config/openvpn) in /etc/config/openvpnconfig/openvpnWRT.conf

float                                                                                                                                            
port 1194                                                                                                                                        
proto udp                                                                                                                                        
dev tun                                                                                                                                          
comp-lzo yes
cipher AES-256-CBC
tls-version-min 1.2
tls-cipher TLS-DHE-RSA-WITH-AES-256-GCM-SHA384:TLS-DHE-RSA-WITH-AES-256-CBC-SHA256:TLS-DHE-RSA-WITH-AES-128-GCM-SHA256
      
dh   easy-rsa/keys/dh2048.pem                                                                                                                    
ca   easy-rsa/keys/ca.crt                                                                                                                        
key  easy-rsa/keys/server.key                                                                                                                    
cert easy-rsa/keys/server.crt                                                                                                                    
#crl-verify /etc/config/openvpnconfig/easy-rsa/keys/crl.pem                                                                                      
ifconfig-pool-persist /tmp/ipp.txt                                                                                                               
client-config-dir clients                                                                                                                        
status /var/log/openvpn-status.log                                                                                                               
                                      
##Don't enable unless you disable all static ip options below#                                                                                   
#server [10.10.84.0 255.255.255.0]                                                                                                               
                                                                  
##begin VPN options for static ip mode (mode server)##                                                                                           
mode server                                                                                                                                      
tls-server                                                                                                                                       
topology subnet                                                                                                                                  
push "topology subnet"                                                                                                                           
ifconfig 10.11.14.1 255.255.255.0                                                                                                                
route-gateway 10.11.14.1                                                                                                                         
push "route-gateway 10.11.14.1"                                                                                                                  
ifconfig-pool 10.11.14.10 10.11.14.254 255.255.255.0                                                                                             
##end VPN options for static ip##                                                                                                                
                                                                     
##general LAN options##                                                                                                                          
push "route 10.11.13.0 255.255.255.0"                                                                                                            
push "dhcp-option DOMAIN lan.local"                                                                                                              
push "dhcp-option DNS 10.11.13.1"                                                                                                                
client-to-client                                                                                                                                 
                                                                           
mute 5                                                                                                                                           
log /tmp/openvpn.log                                                                                                                             
verb 5                                                                                                                                           
                                                                   
keepalive 10 120                                                                                                                                 
persist-key                                                                                                                                     
persist-tun

If you want to enable the static client ip assignments, be sure to uncomment the client-config-dir above and make a directory as such.
root@myWRT:~# mkdir /etc/config/openvpnconfig/clients
write a file inside the clients directory with the same name as the “common name” of the openvpn client certificate.
For example, /etc/config/openvpnconfig/clients/jason
ifconfig-push 10.11.13.123 255.255.255.0
This will reserve 10.11.13.123 for user jason.

Enable and start the service:
root@myWRT:~# /etc/init.d/openvpn enable
root@myWRT:~# /etc/init.d/openvpn restart
check for errors
root@myWRT:~# cat /tmp/openvpn.log

Sometimes its helpful to run it by hand, for troubleshooting.
root@myWRT:~# cd /etc/config/openvpnconfig/
root@myWRT:~# openvpn openvpnWRT.conf


== NETWORKING SETUP ==

Now lets setup the tun interface so that we can add zones
networ-interface-vpn0
in /etc/config/network or in LuCI.

config interface 'vpn0'
	option proto 'none'
	option ifname 'tun0'


== FIREWALL ZONE ==

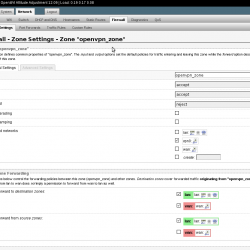
Create a zone called openvpn_zone with vpn0 network.
openvpn_zone

in /etc/config/firewall

config zone
	option input 'ACCEPT'
	option output 'ACCEPT'
	option name 'openvpn_zone'
	option network 'vpn0'
	option forward 'REJECT'


We now explicitly declare the forwards like this.
openvpn_zone to lan zone allow

config forwarding
	option dest 'lan'
	option src 'openvpn_zone'

openvpn_zone to wan allow, if you want openvpn clients to use the wan for example if using redirect-gateway

config forwarding
	option dest 'wan'
	option src 'openvpn_zone'

openvpn_zone to lan allow

config forwarding
	option dest 'openvpn_zone'
	option src 'lan'


== FIREWALL TRAFFIC RULE ==

Allow the openvpn server to accept connections from clients out in the world.
openvpn2device

config rule
	option target 'ACCEPT'
	option src 'wan'
	option proto 'udp'
	option dest_port '1194'
	option name 'openvpn2device'
	option enabled '0'

An overview of traffic rules

openvpn_traffic_rules


** NOTE: Occasionally, I have had to reboot for the above zone’s to work **

== Optional firewall rules to use, instead of using the zones. Not recommended ==
in /etc/firewall.user

# This file is interpreted as shell script.
# Put your custom iptables rules here, they will
# be executed with each firewall (re-)start.

# Allow all traffic in and out of the tun interface.
iptables -A input_rule      -i tun+ -j ACCEPT
iptables -A output_rule     -o tun+ -j ACCEPT
# This rule will allow traffic towards internet from tun
iptables -A forwarding_rule -i tun+ -j ACCEPT
iptables -A forwarding_rule -o tun+ -j ACCEPT


== USER CONFIGURATION ==
root@myWRT:~# build-key jason
or you can run build-key-pass to issue a key that asks the user to enter the password before it is used (more secure).
Once you have completed the build-key, being sure to answer yes to signing the certificate and commit.

Now you need to get the keys for jason and the ca.crt (not ca.key!). Each client needs these files to connect.
You can secure copy them to your computer similar to this:
root@myWRT:~# scp /etc/config/openvpnconfig/easy-rsa/keys/jason.* you@[your computer]:jason-vpn
root@myWRT:~# scp /etc/easy-rsa/keys/ca.crt you@[your computer]:jason-vpn
Then create the client config in the same directory as the crt’s and keys. Call it jason.ovpn and place it in our jason-vpn directory. This is what you will populate jason.ovpn with:

nobind
float
comp-lzo
cipher AES-256-CBC
dev tun
remote [your-server-name] 1194 udp
client
tls-exit
ca ca.crt
cert jason.crt
key jason.key
remote-cert-tls server
mute 5
resolv-retry infinite
#explicit-exit-notify
keepalive 10 60
ping-timer-rem
persist-tun
persist-key
#redirect-gateway def1

I have a script to help add, revoke users and auto generate the above client config http://jasonschaefer.com/stuff/easyrsa-user-setup-openwrt.sh.txt

Test the server by connecting from off-site.
cd into your local config directory where your certs, keys and .ovpn config are.
sudo openvpn jason.ovpn
enter your sudo password

You should see something like this at the end of the openvpn output:

Fri Feb 28 22:19:01 2014 /sbin/ifconfig tun0 10.11.14.4 netmask 255.255.255.0 mtu 1500 broadcast 10.11.14.255
Fri Feb 28 22:19:01 2014 /sbin/route add -net 10.11.13.0 netmask 255.255.255.0 gw 10.11.13.1
Fri Feb 28 22:19:01 2014 Initialization Sequence Completed

and you will see a newly built tun interface

# ip a
38: tun0: mtu 1500 qdisc pfifo_fast state UNKNOWN qlen 100
link/none
inet 10.11.14.4/24 brd 10.11.14.255 scope global tun0
valid_lft forever preferred_lft forever

and the correct route has been pushed to you
root@myWRT:~# ip r
10.11.13.0/24 via 10.11.13.1 dev tun0

== REVOKING A USERS KEY ==

uncomment the following line in /etc/config/openvpnconfig/openvpnWRT.conf:
crl-verify /etc/config/openvpnconfig/easy-rsa/keys/crl.pem

run “revoke-full” with users key as argument:

revoke-full [key-to-revoke]

or run my script easyrsa-user-setup-openwrt.sh [username] revoke

then restart the vpn service so changed take effect:
root@myWRT:~# /etc/init.d/openvpn restart

Let me know in the comments or use the contact form if you find errors or need clarification. This is a concise tutorial and might need some clarification.

Oct 282010
 
 October 28, 2010  Posted by at 12:20 pm documentation, Tutorial, vpn Tagged with: , ,  No Responses »

These are the manual instructions for installing and configuring OpenVPN client.

After having many problems over the years with openvpn gui breaking, I have devised a reliable work around. Create the following batch script, name it something like ovpnConnect.bat, and right click to “Run as Administrator”. This does require the openvpn gui from openvpn.net to be installed. It calls the openvpn.exe. You can also add multiple vpn client connections!

@echo off

net session >nul 2>&1
if %errorLevel% == 0 (
    echo Success: Administrative permissions confirmed.
) else (
    echo Failure: Please right click and "Run as administrator"
pause
exit 0
 )

cd "c:\Program Files\OpenVPN\config\" && "c:\Program Files\OpenVPN\bin\openvpn.exe" [userconfig].ovpn

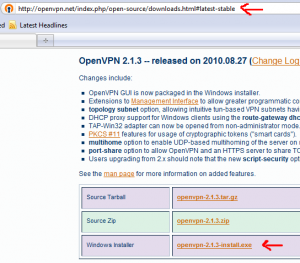
Download openvpn gui at http://openvpn.net/index.php/open-source/downloads.html#latest-stable

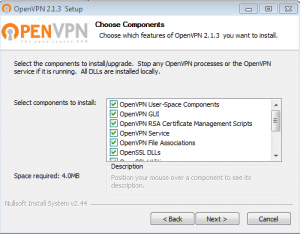
Run installer

Leave the components section as default.

Accept the TAP driver install

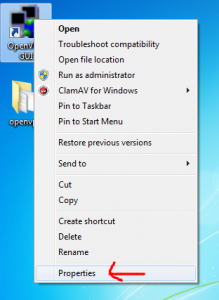
Right click on OpenVPN GUI and select properties

Go to Compatibility tab and select “run this program as administrator”
(It requires admin priviledges because it needs to write routes for the new VPN tunnel. Without, it will connect but won’t know how to reach the other network.)

Get your OpenVPN configuration files from the system administrator. Copy and paste them into C:\Program Files\OpenVPN\config


ca.crt (certificate authority)
jason.crt (client certificate)
jason.key (client secret key)
jason.ovpn (client configuration). Here are the contents of jason.ovpn:

client
dev tun0
cert jason.crt
key jason.key
ca ca.crt
remote vpn.server 1194

Now you can launch OpenVPN GUI by double clicking the icon on the desktop (the one we just set to run as admin). This will launch the OpenVPN GUI into the system tray.

Click on system tray, right click on OpenVPN GUI, left click “Connect”.

If all goes well, you will successfully connect. The OpenVPN GUI systray icon turns green. Now you are on the Virtual Private Network!