This outlines a typical VPN implementation with server, clients and routing. Using Attitude Adjustment 12.09. Although, this should work on any new version of OpenWRT. Last tested on version 17.
Start by ssh’ing into the router and installing packages.
root@myWRT:~# opkg update
root@myWRT:~# opkg install openvpn-openssl openvpn-easy-rsa
Create a “openvpnconfig” directory under config and move the easy-rsa directory into it. The nice thing about this setup is that backups will include all openvpn relevant files automatically, because they are under /etc/config/
root@myWRT:~# mkdir /etc/config/openvpnconfig
root@myWRT:~# mv /etc/easy-rsa/ /etc/config/openvpnconfig/
root@myWRT:~# cd /etc
root@myWRT:~# ln -s config/openvpnconfig/easy-rsa
(this creates a relative symlink)
== CERTIFICATE AUTHORITY FOR OPENVPN ==
edit the following or don’t if you want to enter it manually on certificate creation.
At the end of the /etc/easy-rsa/vars file:
# These are the default values for fields
# which will be placed in the certificate.
# Don't leave any of these fields blank.
export KEY_COUNTRY="US" <-*edit*
export KEY_PROVINCE="CA" <-*edit*
export KEY_CITY="SanFrancisco" <-*edit*
export KEY_ORG="Fort-Funston" <-*edit*
export KEY_EMAIL="me@myhost.mydomain"
export KEY_EMAIL=mail@host.domain
export KEY_CN=changeme <-*edit - servers hostname*
export KEY_NAME=changeme
export KEY_OU=changeme
export PKCS11_MODULE_PATH=changeme
export PKCS11_PIN=1234
root@myWRT:~# clean-all (run this to ensure your starting with a clean slate)
root@myWRT:~# build-ca
root@myWRT:~# build-dh (very slow.. this can be run elsewhere and copied over to the openwrt vpn server **)
root@myWRT:~# build-key-server server (don’t set a challenge password, Answer yes to sign the certificate and yes to commit.)
** building diffie hellman “build-dh” on a fast computer and copying to slow router/computer:
run ps while you are running build-dh to see what command is being used.
12158 root 3304 R openssl dhparam -out /etc/easy-rsa/keys/dh2048.pem 2048
don’t forget to ctrl + c your build-dh command
now go to your fast laptop:
jason@laptop:~$ openssl dhparam -out dh2048.pem 2048
jason@laptop:~$ scp dh2048.pem root@10.11.13.1:/etc/config/openvpnconfig/easy-rsa/keys
Moving on to the config files:
Instead of using UCI syntax we can break this out to be more openvpn standard and troubleshooting friendly. Also, I have added the ability to set static ip’s for the openvpn clients.
== OPENVPN SERVER CONFIG ==
Overwrite /etc/config/openvpn with the following config
##/etc/config/openvpn##
package openvpn
config openvpn openvpn_WRT
option enabled 1
option config /etc/config/openvpnconfig/openvpnWRT.conf
The following is the openvpn server config (which is called by /etc/config/openvpn) in /etc/config/openvpnconfig/openvpnWRT.conf
float
port 1194
proto udp
dev tun
comp-lzo yes
cipher AES-256-CBC
tls-version-min 1.2
tls-cipher TLS-DHE-RSA-WITH-AES-256-GCM-SHA384:TLS-DHE-RSA-WITH-AES-256-CBC-SHA256:TLS-DHE-RSA-WITH-AES-128-GCM-SHA256

dh   easy-rsa/keys/dh2048.pem
ca   easy-rsa/keys/ca.crt
key  easy-rsa/keys/server.key
cert easy-rsa/keys/server.crt
#crl-verify /etc/config/openvpnconfig/easy-rsa/keys/crl.pem
ifconfig-pool-persist /tmp/ipp.txt
client-config-dir clients
status /var/log/openvpn-status.log

##Don't enable unless you disable all static ip options below#
#server [10.10.84.0 255.255.255.0]

##begin VPN options for static ip mode (mode server)##
mode server
tls-server
topology subnet
push "topology subnet"
ifconfig 10.11.14.1 255.255.255.0
route-gateway 10.11.14.1
push "route-gateway 10.11.14.1"
ifconfig-pool 10.11.14.10 10.11.14.254 255.255.255.0
##end VPN options for static ip##

##general LAN options##
push "route 10.11.13.0 255.255.255.0"
push "dhcp-option DOMAIN lan.local"
push "dhcp-option DNS 10.11.13.1"
client-to-client

mute 5
log /tmp/openvpn.log
verb 5

keepalive 10 120
persist-key
persist-tun
If you want to enable the static client ip assignments, be sure to uncomment the client-config-dir above and make a directory as such.
root@myWRT:~# mkdir /etc/config/openvpnconfig/clients
write a file inside the clients directory with the same name as the “common name” of the openvpn client certificate.
For example, /etc/config/openvpnconfig/clients/jason
ifconfig-push 10.11.13.123 255.255.255.0
This will reserve 10.11.13.123 for user jason.
Enable and start the service:
root@myWRT:~# /etc/init.d/openvpn enable
root@myWRT:~# /etc/init.d/openvpn restart
check for errors
root@myWRT:~# cat /tmp/openvpn.log
Sometimes its helpful to run it by hand, for troubleshooting.
root@myWRT:~# cd /etc/config/openvpnconfig/
root@myWRT:~# openvpn openvpnWRT.conf
== NETWORKING SETUP ==
Now lets setup the tun interface so that we can add zones

in /etc/config/network or in LuCI.
config interface 'vpn0'
	option proto 'none'
	option ifname 'tun0'
== FIREWALL ZONE ==
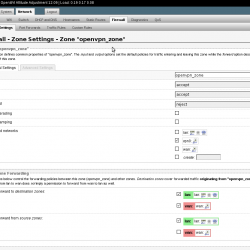
Create a zone called openvpn_zone with vpn0 network.

in /etc/config/firewall
config zone
	option input 'ACCEPT'
	option output 'ACCEPT'
	option name 'openvpn_zone'
	option network 'vpn0'
	option forward 'REJECT'
We now explicitly declare the forwards like this.
openvpn_zone to lan zone allow
config forwarding
	option dest 'lan'
	option src 'openvpn_zone'
openvpn_zone to wan allow, if you want openvpn clients to use the wan for example if using redirect-gateway
config forwarding
	option dest 'wan'
	option src 'openvpn_zone'
openvpn_zone to lan allow
config forwarding
	option dest 'openvpn_zone'
	option src 'lan'
== FIREWALL TRAFFIC RULE ==
Allow the openvpn server to accept connections from clients out in the world.

config rule
	option target 'ACCEPT'
	option src 'wan'
	option proto 'udp'
	option dest_port '1194'
	option name 'openvpn2device'
	option enabled '0'
An overview of traffic rules
** NOTE: Occasionally, I have had to reboot for the above zone’s to work **
== Optional firewall rules to use, instead of using the zones. Not recommended ==
in /etc/firewall.user
# This file is interpreted as shell script.
# Put your custom iptables rules here, they will
# be executed with each firewall (re-)start.

# Allow all traffic in and out of the tun interface.
iptables -A input_rule      -i tun+ -j ACCEPT
iptables -A output_rule     -o tun+ -j ACCEPT
# This rule will allow traffic towards internet from tun
iptables -A forwarding_rule -i tun+ -j ACCEPT
iptables -A forwarding_rule -o tun+ -j ACCEPT
== USER CONFIGURATION ==
root@myWRT:~# build-key jason
or you can run build-key-pass to issue a key that asks the user to enter the password before it is used (more secure).
Once you have completed the build-key, being sure to answer yes to signing the certificate and commit.
Now you need to get the keys for jason and the ca.crt (not ca.key!). Each client needs these files to connect.
You can secure copy them to your computer similar to this:
root@myWRT:~# scp /etc/config/openvpnconfig/easy-rsa/keys/jason.* you@[your computer]:jason-vpn
root@myWRT:~# scp /etc/easy-rsa/keys/ca.crt you@[your computer]:jason-vpn
Then create the client config in the same directory as the crt’s and keys. Call it jason.ovpn and place it in our jason-vpn directory. This is what you will populate jason.ovpn with:
nobind
float
comp-lzo
cipher AES-256-CBC
dev tun
remote [your-server-name] 1194 udp
client
tls-exit
ca ca.crt
cert jason.crt
key jason.key
remote-cert-tls server
mute 5
resolv-retry infinite
#explicit-exit-notify
keepalive 10 60
ping-timer-rem
persist-tun
persist-key
#redirect-gateway def1
I have a script to help add, revoke users and auto generate the above client config http://jasonschaefer.com/stuff/easyrsa-user-setup-openwrt.sh.txt
Test the server by connecting from off-site.
cd into your local config directory where your certs, keys and .ovpn config are.
sudo openvpn jason.ovpn

enter your sudo password
You should see something like this at the end of the openvpn output:
Fri Feb 28 22:19:01 2014 /sbin/ifconfig tun0 10.11.14.4 netmask 255.255.255.0 mtu 1500 broadcast 10.11.14.255
Fri Feb 28 22:19:01 2014 /sbin/route add -net 10.11.13.0 netmask 255.255.255.0 gw 10.11.13.1
Fri Feb 28 22:19:01 2014 Initialization Sequence Completed
and you will see a newly built tun interface
# ip a
38: tun0:
link/none
inet 10.11.14.4/24 brd 10.11.14.255 scope global tun0
valid_lft forever preferred_lft forever
and the correct route has been pushed to you
root@myWRT:~# ip r
10.11.13.0/24 via 10.11.13.1 dev tun0
== REVOKING A USERS KEY ==
uncomment the following line in /etc/config/openvpnconfig/openvpnWRT.conf:
crl-verify /etc/config/openvpnconfig/easy-rsa/keys/crl.pem
run “revoke-full” with users key as argument:
revoke-full [key-to-revoke]
or run my script easyrsa-user-setup-openwrt.sh [username] revoke
then restart the vpn service so changed take effect:
root@myWRT:~# /etc/init.d/openvpn restart
Let me know in the comments or use the contact form if you find errors or need clarification. This is a concise tutorial and might need some clarification.
