jason schaefer . com

"arguing that you don’t care about the right to privacy because you have nothing to hide is no different than saying you don’t care about free speech because you have nothing to say."

Category: firewall

  • OpenWRT, Access Point only config. LAN and PUBLIC wireless on an existing subnet

    In this scenario we will be implementing a openWRT as a wireless access point only. One wireless essid will be LAN accessible and the other will be segregated from the LAN but able to access the WAN. The openWRT in this example will not be the gateway to the network. Another device is the gateway and there is an existing dhcp server.

                                PUBLIC wifi
                             172.16.134.0/24
                                      |
                         public gateway and dhcp server
                                172.16.134.1
                                      \
                       Source NAT to 10.101.101.10
                                                  \
    ISP <-Gateway-> LAN wired 10.101.101.0/24 <-openWRT-> 
                                                  /
                               LAN wifi (wpa2+aes)
                               10.101.101.0/24


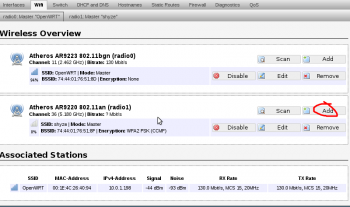
    1. Add a new wireless access point

    wifinogw.1.add-wireless-essid

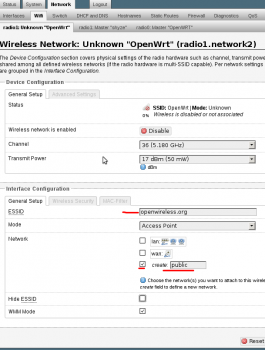
    2. Settings for the new wireless access point. Create a new network interface of “public”. Don’t use any encryption, as this is for general public use.

    wifinogw.2.wifi-settings

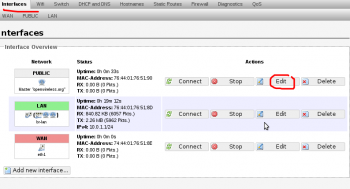
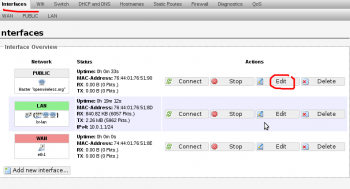
    3. Edit network interface for the public network

    wifinogw.3.public-interface-edit

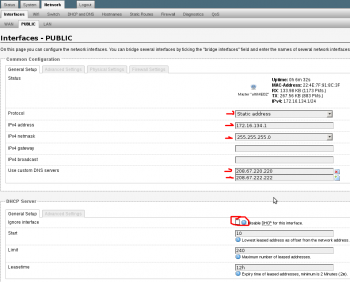
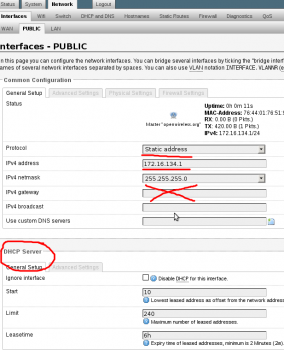
    4. Edit PUBLIC interface settings. Set to static address and enable DHCP server for this new network.

    wifinogw.4.pub-int-settings

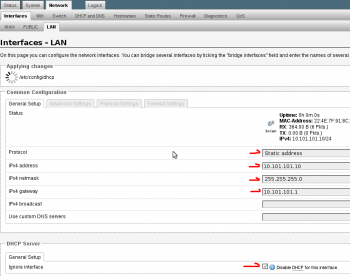
    5. Edit the LAN interface. Set the lan interface to an un-used ip of the existing network. Don’t set to “dhcp client” as you will lose connectivity and need to perform a recovery on your openwrt device. Be sure to disabled the DHCP server as the existing network already has one.

    wifinogw.5.lan-settings

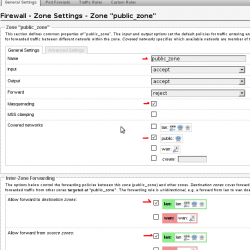
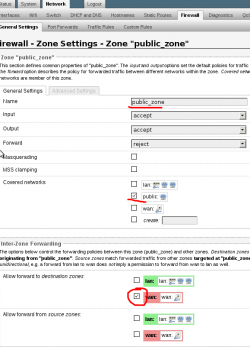
    6. Add a new zone and call it “public_zone”. Masquarade it and put it in the public network. Allow forwarding to and from “lan” zone. We will limit this later with specific firewall rules.

    fw_public_zone

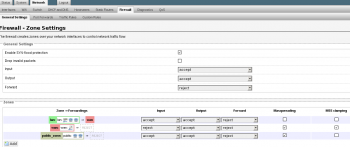
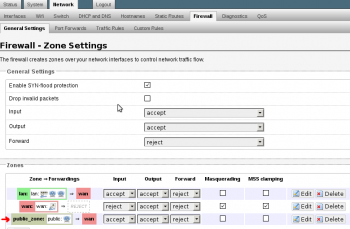
    7. This is what the general firewall zones should look like

    wifinogw.7.fw-general-overview

    8. Under the Firewall -> Traffic Rules section add a new Source NAT Rule. Call it “pub2lan“. Set the “Source zone” to “public_zone” and the “Destination zone” to “lan” and set the drop down option “To source IP” to br-lan interface, in this example its 10.101.101.10. Leave “To source port” blank. This SNAT rule will translate all traffic on the public wireless network of 172.16.134.0/24 into the IP of 10.101.101.10. This is the redirect rule from /etc/config/firewall
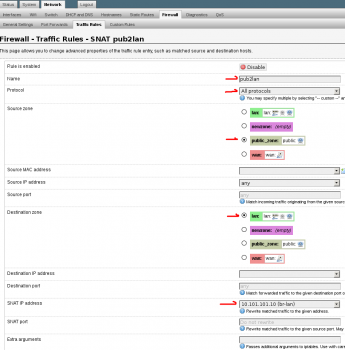
    wifinogw.8.fw-tr-snat

    config redirect
    option target 'SNAT'
    option src 'public_zone'
    option dest 'lan'
    option proto 'all'
    option name 'pub2lan'
    option src_dip '10.101.101.10'
    option enabled '1'

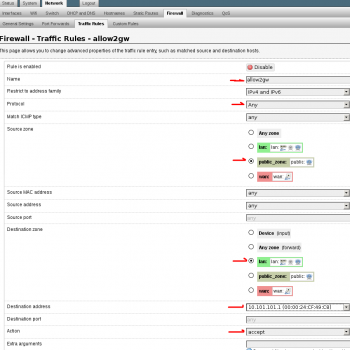
    9. Setup a “New forward rule:” Set name to allow2gw or similar. Source zone to “public_zone” Destination zone to “lan” Click “Add and edit…” Protocols should be “Any”, Destination address is the gateway of the network. In this case 10.101.101.1. The following is the /etc/config/firewall rule for reference. This will allow traffic from the public_zone to reach the gateway of the network.

    wifinogw.9.fw-tr-forward-allow2gw

    config rule
    option target 'ACCEPT'
    option proto 'all'
    option name 'allow2gw'
    option src 'public_zone'
    option dest 'lan'
    option dest_ip '10.101.101.1'

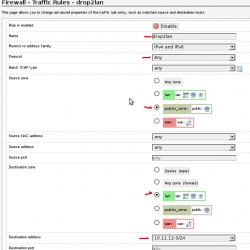
    10. Setup a “New forward rule”. Set the name to drop2lan or similar. Set the Source zone to “public_zone” and Destination zone to “lan”. Click “Add and edit…” Set Protocol to “Any”, Destination address to custom and enter the subnet of the LAN. In this case its 10.101.101.0/24, set “Action” to “drop”. You can add more rules like this one to limit access to other networks or hosts as needed.

    drop2lan

    config rule
    option name 'drop2lan'
    option src 'public_zone'
    option proto 'all'
    option target 'DROP'
    option dest 'lan'
    option dest_ip '10.101.101.0/24'


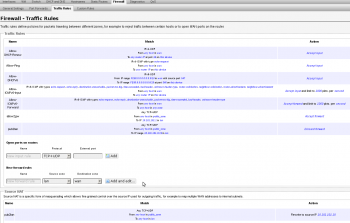
    11. Firewall Traffic Rule overview. There is an error on this view. The following rules have “option proto ‘all’” set and the luci web interface shows “Any TCP+UDP”. This is simply a bug in the luci interface and can be ignored. The order of these rules is very important. In this case you can see we added the “Allow to 10.101.101.1” before the “Drop to 10.101.101.0/24”. If reversed, the lan including the gateway would not be accessible from the public wireless AP. Therefore, you would not be able to reach the Internet.
    wifinogw.11.fw-tr-overview

  • OpenWRT setting up a public wireless access that is firewalled from the LAN

    In this post I will outline how to use zones to create public firewalled networks. A device that can bring up multiple interfaces per radio is very attractive here. One essid for private wireless and another for open public wireless. The Atheros ath9k chipsets are very well supported in this regard because they are free software.
    This post is different than my older post where we have a private LAN behind our WAN interface that we need to protect… In this scenario we have our ISP connected directly to the openWRT WAN port and we need to bring up a public wireless that is segregated from the LAN. Like so:

                                             "public wifi"
                                                     /
    ISP <-openWRT fw-> LAN 192.168.1.0/24 <-public_zone-> PUBLIC 172.16.134.0/24
                            \ 
                     "private LAN wifi"

    Obviously the zone can be utilized however you like. Another common option would be to firewall a open wireless network from the LAN. And forgo the insecure nature of a “secured” wireless altogether. The OpenWRT could be running openvpn, that you connect to over the “insecure” wireless, now thats secure!

    The following steps are done via the web interface (luci).

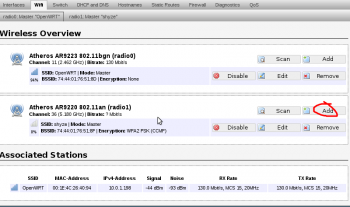
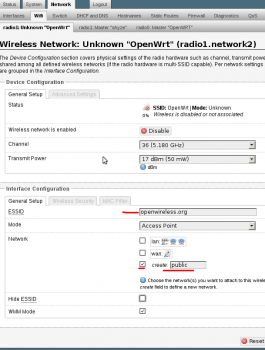
    1. Start by adding a new wireless interface. In this case to the 5ghz radio. You can do this again for the 2.4ghz radio. wireless 1. add

    2. Set the essid and network name “public”. This will allow us to use firewall zones to segregate the networks, rather than excluding individual rfc1918 subnets like in the first example.wireless 2. new wifi settings


    3. Edit the interface “PUBLIC” so that we can set it as a static ip.wireless 3. edit interface

    4. Change the protocol to “static address” set a ip for it and a subnet. DO NOT set a gateway. This will write a new default gateway to the routing table and cause the internet to break occasionally. Setup a dhcp server for this network.wireless 4. public interface

    5. In the firewall section. Setup a zone called something like “public_zone” and assign it to the “public” network. And allow it to forward to “WAN” zone.wireless 5. firewall zone

    6. This is what the general firewall zone’s should look like now.wireless 6. general firewall zone

    Be sure to test it. Connect to the public and try and nmap a known host on the private and vice versa. A few times I have needed to reboot the router for everything to start working properly. It could be because I tinkered too much and caused a hickup. Just something to keep in mind..


  • OpenWRT, firewall to block public wireless users from private lan behind wan

    The updated and more flexible way to do this is outlined here. It also requires updated hardware. The wrt54gl only supports openwrt v10 (backfire). I would like to add that despite the wrt54gl literally being ancient, its still a rock solid device today. Of course, only if openwrt is installed!

    A while ago Second Street Brewery asked for a good stable public wireless internet connection. Of course, the solution was obvious, openwrt! In this case a linksys wrt54gl. The office, point of sale and public networks all share the same gateway. The problem was segregating the public wireless network from the private office lan. Sam (http://thepromisedlan.org) and I set out to setup a firewall to protect them. This is what we came up with:

             "secured office wifi"
                    /
    ISP <-fw-> office LAN 10.1.10.0/24 <-fw-> (linksys) "open public wifi" 
    (clients on public wifi cannot reach 10.1.10.0/24 or any other private subnet)

    check if the following is in /etc/config/firewall otherwise, add it

    config include
    option path /etc/firewall.user

    and in /etc/firewall.user we put:

    #Insert this into the chain, so 10.1.10.0/24 (office) can connect to public 192.168.10.0/24.
    #This rule gets repeated by the setup script /etc/init.d/firewall.
    iptables -I FORWARD 1 -m state --state RELATED,ESTABLISHED -j ACCEPT
    
    #block all traffic to any possible private network address (10.*.*.*, 172.16-32.*.*, 192.168.*.*)
    iptables -I FORWARD 2 -d 192.168.0.0/16 -j DROP
    iptables -I FORWARD 2 -d 172.16.0.0/12 -j DROP
    iptables -I FORWARD 2 -d 10.0.0.0/8 -j DROP

    If you would like to have remote administration on the openwrt so you can access the luci web interface and ssh from the wan side of the router, you can change /etc/config/firewall wan zone to allow it. !!WARNING!! If you are directly connected to the internet, this will expose your open ports to the world. You should take precautions to secure them before changing this firewall rule.

    config 'zone'
      option 'name' 'wan'
      option 'input' 'REJECT' #

    or if you just want to allow remote ssh access

    config rule
      option target 'ACCEPT'
      option src 'wan'
      option proto 'tcp'
      option dest_port '22'
      option name 'ssh'