In this example I will setup a OpenWRT router to tunnel all traffic through a Wireguard VPN interface. I will attempt to keep this as simple and concise as usual ;-)
Start by setting up a peer on the wireguard “server”. If you don’t control your Wireguard server and just have keys and an endpoint from someone else’s service then you can skip this. I have written a tutorial on setting up the wg server from beginning to end. https://jasonschaefer.com/wireguard-vpn-on-openwrt/
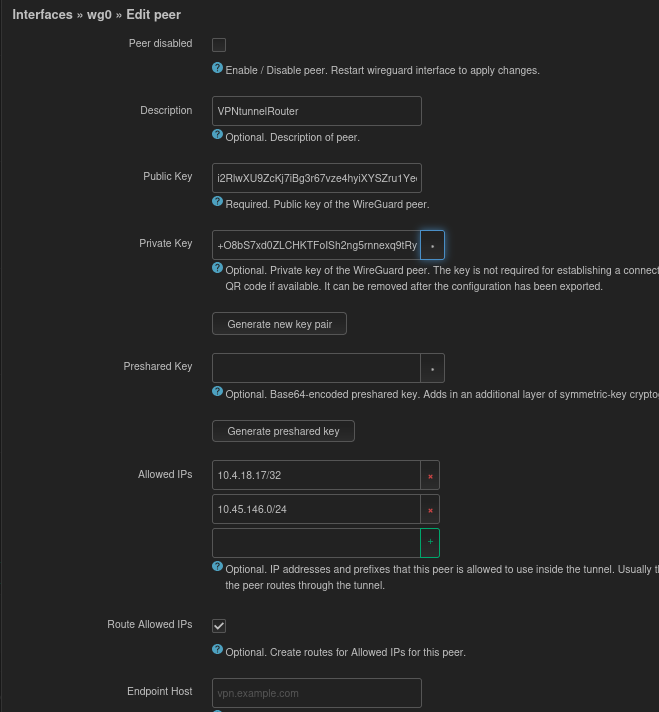
Use the generate new key pair if you don’t want to mess with the command line “wg genkey” method. Note the public key (i2Rl…) and private (+O8b…) for later use. The Allowed IP 10.4.18.17/32 is for the Wireguard peer to peer traffic and the 10.45.146.0/24 is the remote LAN subnet of the router I will setup later. “Route Allowed IPs” adds 10.45.146.0/24 to this Wireguards “server” routing table so we don’t need to use NAT masquerading. Additionally, this allows for two subnets to reach each other which is nice for an office setup or similar.
We need the public key from the Wireguard “server” found on the General Settings page of the “server” interface:
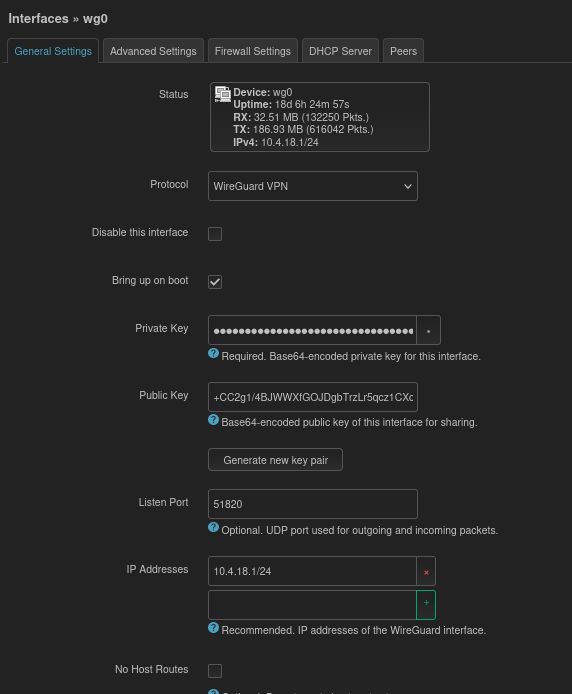
Now that we have the public (i2Rl…) and private key (+O8b…) for the peer and the public key (+CC2…) of the Wireguard “server” peer we can move onto setting up the OpenWRT VPN Router “client”.
Install luci-proto-wireguard on the VPN client router. Use the System -> Software gui to do this easily.
Now “add new interface” under Networking -> Interfaces. Name it wg0 (or whatever you want) and select Protocol “WireGuard VPN”. This takes you to the “general settings”. Use the public (i2Rl…) and private (+O8b…) key from the remote “server” wireguard peer that I setup in the first step of this tutorial. “IP addresses” is the ip also specified in the remote server peer of 10.4.18.17/32

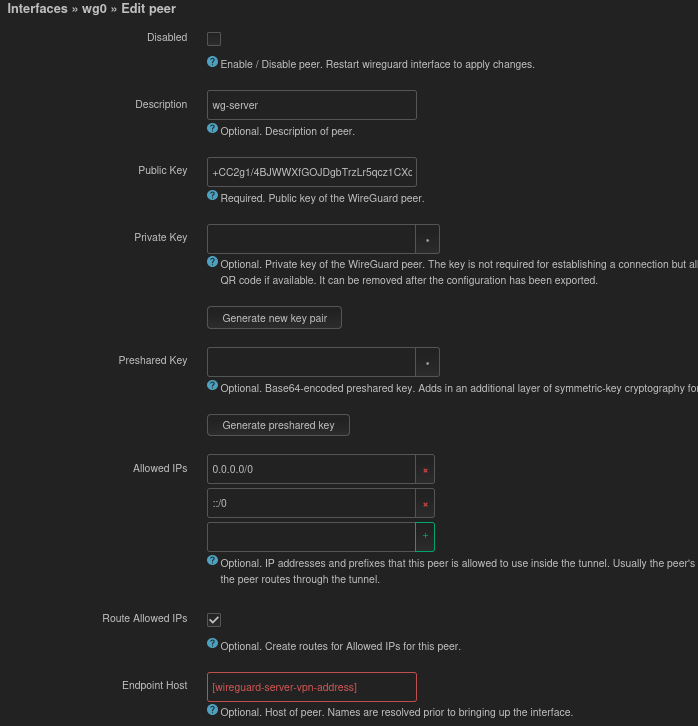
From the peer tab, click “Add new peer” and use the public key (+CC2…) of the Wireguard “server” from the first steps of this tutorial. Allowed IP’s will be 0.0.0.0/0 for all ip4 traffic and ::/0 for all ip6 traffic. Route allowed IP’s will be enabled and Endpoint host is the wireguard server hostname or ip. Persistent keep alive can optionally be set to 25 on both ends of the VPN (not shown in screenshots).
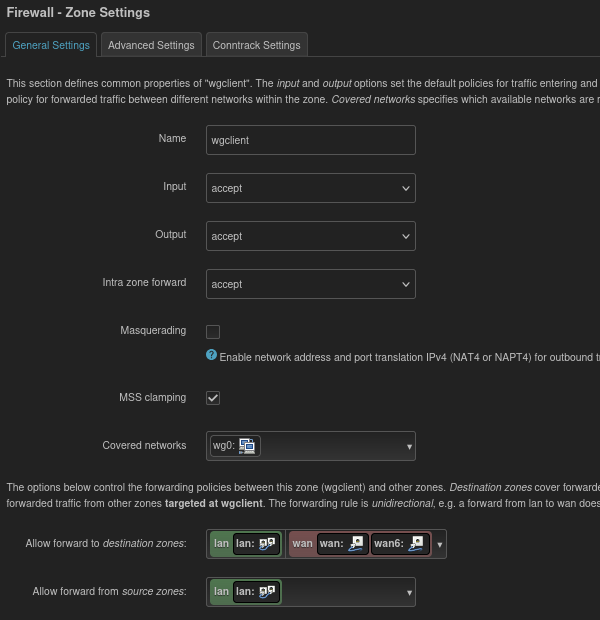
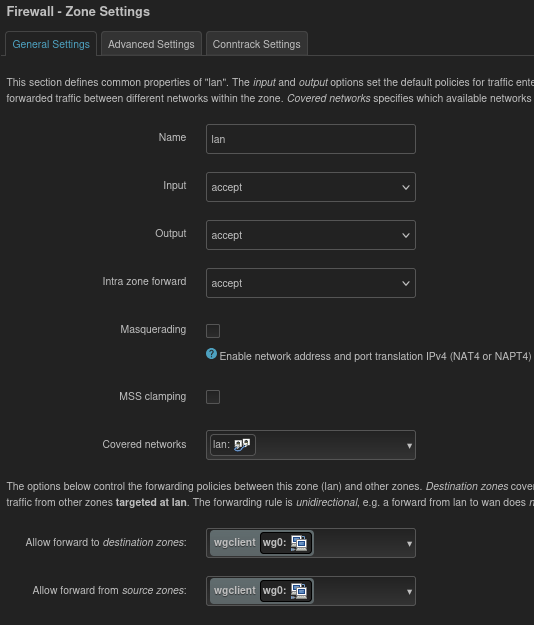
Moving onto firewall setup. This allows all traffic from remote network to reach local LAN and vice versa. I like to handle security on a per device basis more than rely on intermediate restrictions. MSS clamping is not required but may be useful under certain conditions to avoid fragmentation. Masquerading could be used but I hate NAT and would rather use proper routing to establish a connection. This is why “Route allowed IP’s” for “Allowed Networks” 10.45.146.0/24 is set on the “server”.
Ok, now for the magic of how to get all traffic out the wg0 interface without locking yourself out of the router and having to factory reset or serial in. lol
In the Firewall zone for LAN set the “Allow forward to destination zones:” and “Allow forward from source zones:” to the Wireguard firewall zone (in this case I called it wgclient).
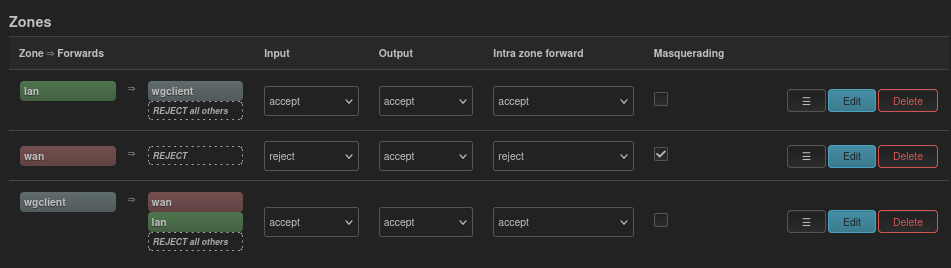
Here is an overview of the firewall settings
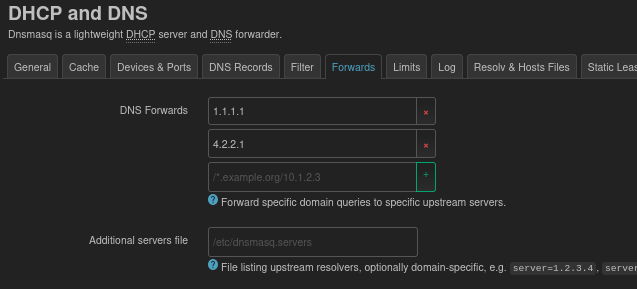
Lastly, if the endpoint vpn “server” is using a hostname you will need DNS that can resolve. Use the Forwards tab and use whatever DNS is appropriate.
\o/
Leave a Reply